Presence Detection in Home Automation is the holy grail. Knowing that particular members of the household are entering a room allows you to customize certain aspects. Each member of the family would want different temperatures, light schemes, TV inputs, etc. If you knew when those members entered or left, you could automate the environment.
But how do you decide whose wishes to prioritize when there are multiple people in the same room? More importantly, how do you get each member of the family to cooperate with your artificial system?
When you search for an answer to this question, the usual solution is Low Powered Blue Tooth with Pi Zero W’s. Now that requires people to bring their phones into each room as they move through the house. I don’t always have my phone on me, and this can become time-consuming to set up. Here’s a great post on integrating it if that’s something you are ready to pursue.
Please note that this is an affiliate links, and I may receive compensation from any purchase that you make using this link.
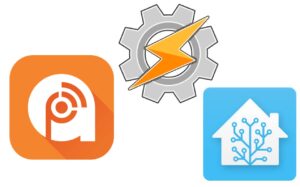
Instead, I chose a little less automatic and a little more physical. I will use Home Assistant Cloud, Tasker, and a couple of physical buttons to set my presence throughout the apartment and extend it organically over time.
Home Hub
I’m using Home Assistant as my “one source of truth.” Having one place where I consolidate my logic is valuable, and Home Assistant has webhooks that I can call from my other tools.
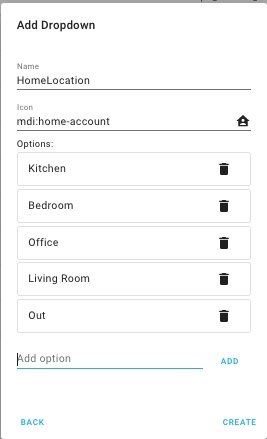
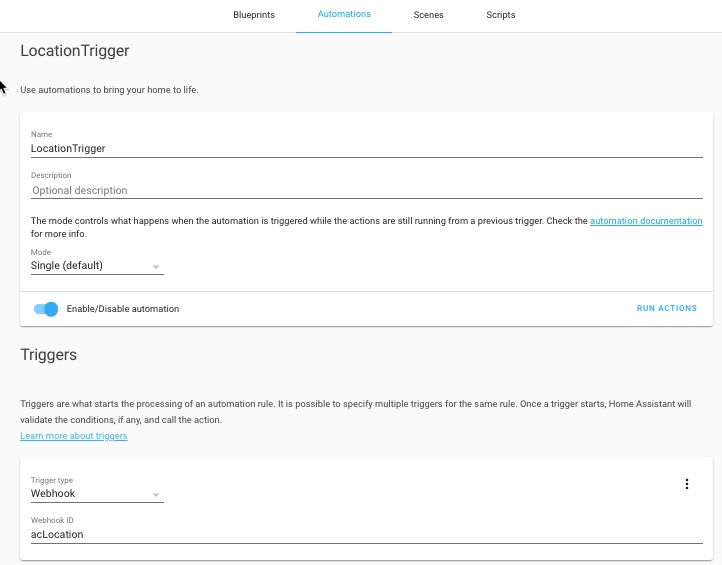
First, Create a Helper (Configurations -> Helpers) as a Dropdown. This will allow me to extend my functionality if there are other rooms I want to track.
Since we want a way to change our location via a webhook, we will create an Automation (Configurations -> Automation) and set your Trigger Type to webhook, and assign a Webhook ID. Add a default action (like a light change) to save and/or test it. We’ll come back and add the presence detection in a minute.
If you navigate to your Home Assistant Cloud (Configuration -> Home Assistant Cloud), you can see all of your webhooks (near the bottom). Turn on your automation, and you will get the address for the webhook.
Testing with Postman
We now have everything we need to let Home Assistant know where we are. Go back to your automation and add our dynamic location modifier:
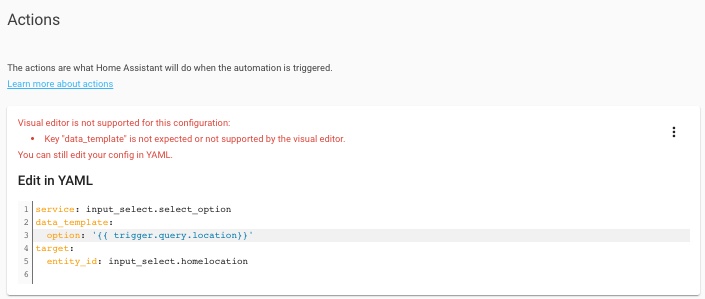
This way, we can pass our location via our POST request parameters and dynamically update our helper’s value. Notice the syntax :
{{ trigger.query.location }}
The trigger.query picks up the query parameters from the webhook. If you want to pass it as a body or in JSON raw format, you can use trigger.data or trigger.json respectively. This would allow you to use multiple data points (like adding a person to the payload).
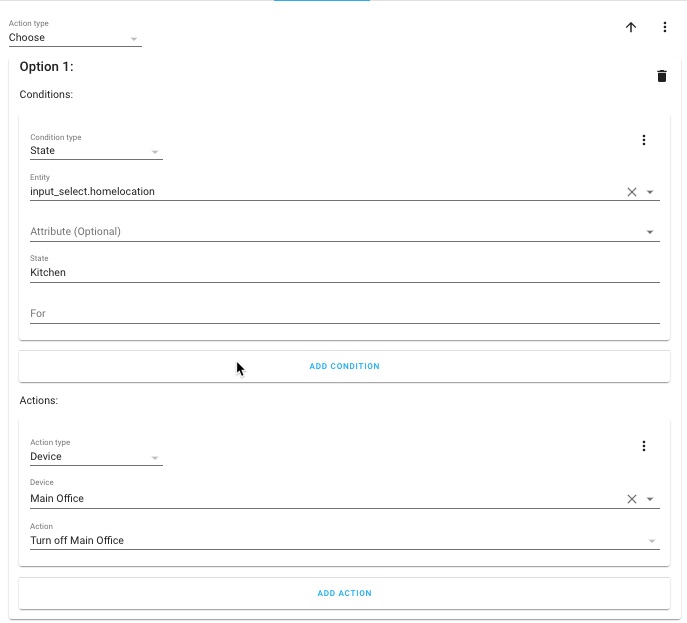
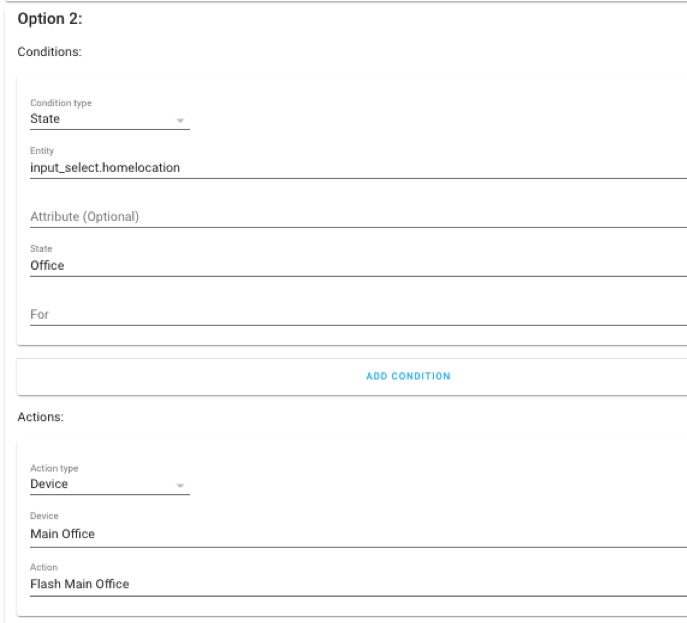
I also created another Automation that listens for the change in detection, this way I can call my presence based automations from any other script or automation in my Home Assistant installation!
Adding Presence Detection Organically
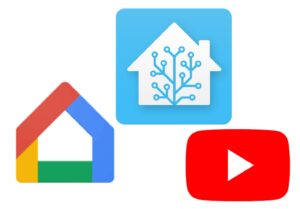
Recently, I automated my daily podcast downloads. As I’m preparing my breakfast, I play my podcasts on my Kitchen Alexa. Since I’m using Tasker to connect my phone to my Alexa, I’m going to let Home Assistant know where I am in the same flow.
Please note that this is an affiliate links, and I may receive compensation from any purchase that you make using this link.
You can easily send an HTTP request via Tasker (New Action -> HTTP Requests). Scroll down to the bottom, and you can copy and paste your webhook. If you don’t want to hardcode your parameters, you don’t have to, but I’m ok with it as I’m currently testing.
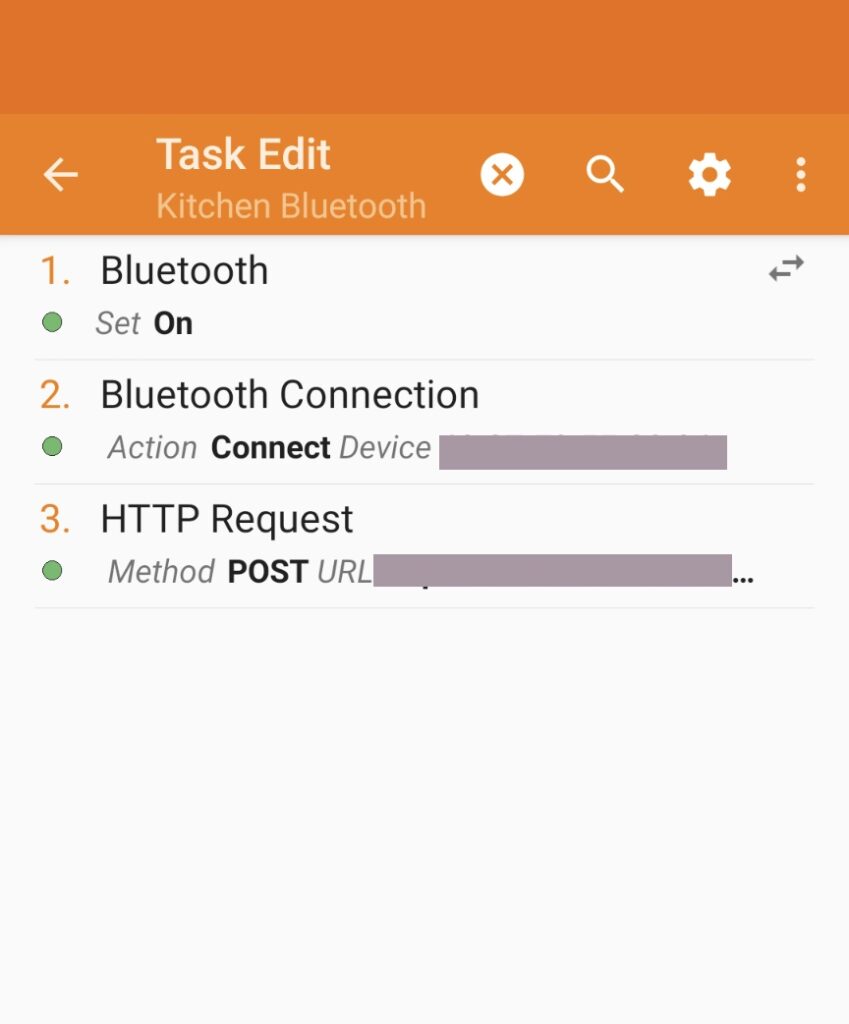
Adding an HTTP Request to Tasker 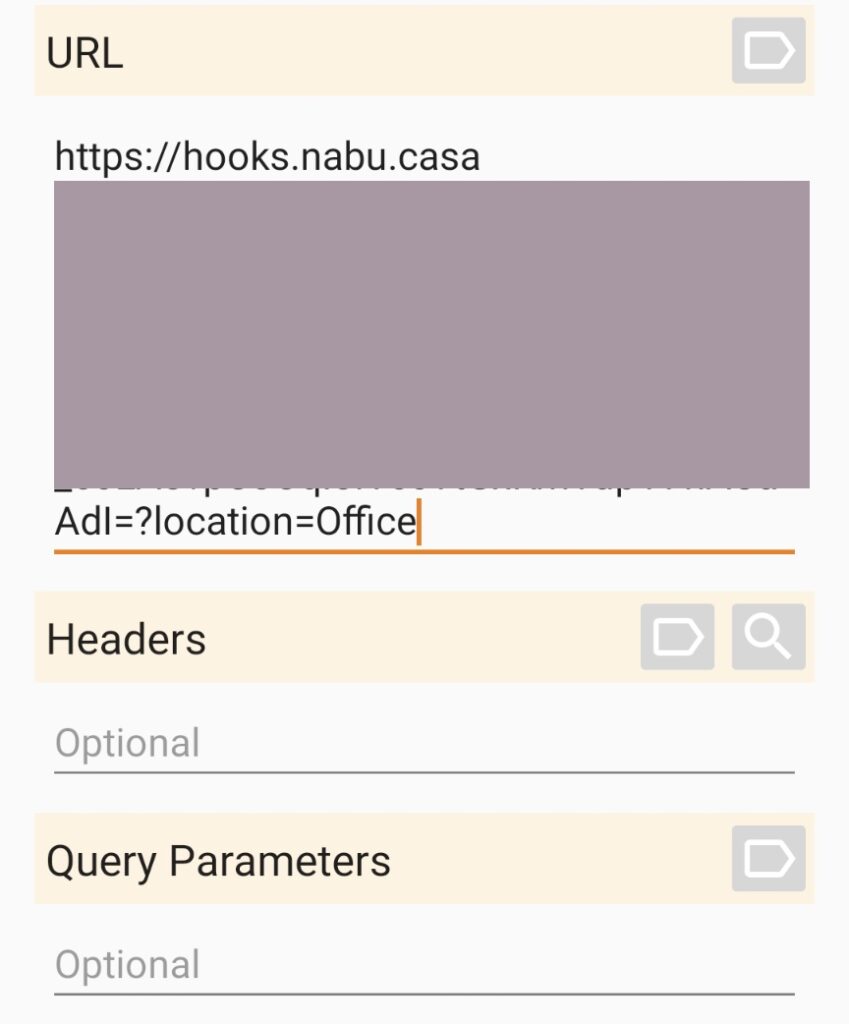
Adding the Query Parameters
Extending our Presence Detection
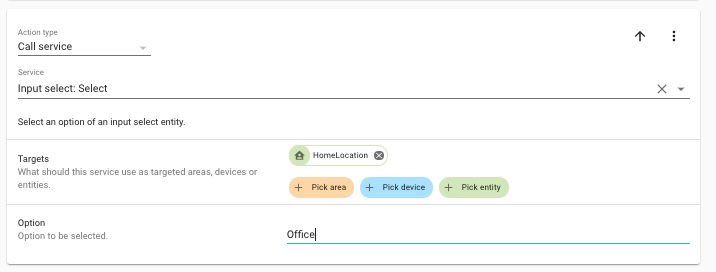
I’ve already set up an NFC tag in my Home Assistant for my office that kicks off my day every morning, so it’s straightforward to add a step to let Home Assistant know that I’m in my office. As you can see below, updating our Location is as easy as calling service in Home Assistant.
When I’m ready to start unwinding at the end of the day, I can also add it to my gaming automation. A side effect of using the Phillips Hue Dimmer Switch here is that I can use it to detect four different people from the same control panel, allowing me to track four people from the same control.
Please note that these are affiliate links, and I may receive compensation from any purchase that you make using them
There you have it, presence detection for the price of Tasker and Home Assistant Cloud. You can integrate as much or as little as each household member wants and keep track of everything in one place!