The New Year is a traditional time to start something new in our life. A new habit, a new philosophy, or a new set of goals. After a particularly rough December 2020, I decided to put a goal into practice by creating a data tracker.
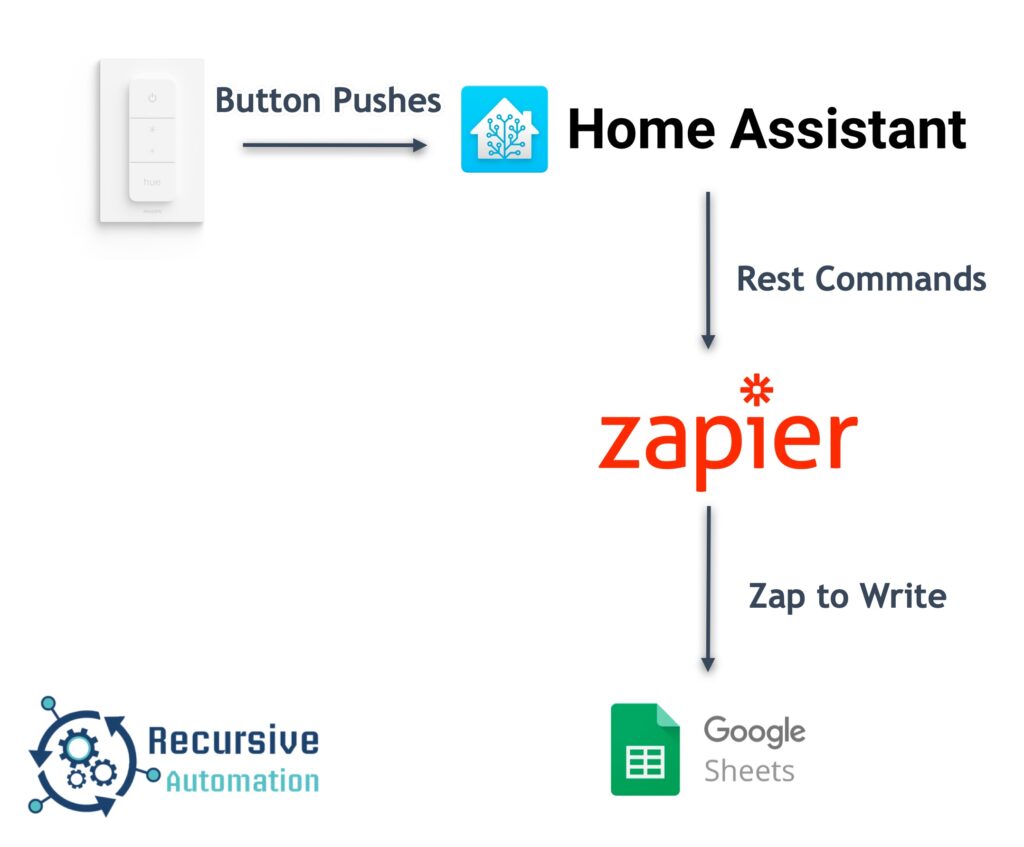
I use Home Assistant for a whole slew of purposes in my life, from setting mood lighting, tracking my progress at work, and automating my podcast downloads. It only makes sense to use Home Assistant to help me with one of my goals … tracking my overall mental wellness.
I’ll be using a combination of Google Sheets, Zapier, and Home Assistant to make this as easy as possible. Easy is essential here because we want to ensure that the data collection is as frictionless as possible.
Setup
Google Sheets
The first step is to set up the Google Sheet. Decide what information that you want to collect. In my case, I want to track the date, time, and emotions that I’m feeling. I’ve also added a column called “Type,” to write other data collection types later if I wish.

Zapier
The next step is to set up the Zapier “Zap” that will write to the Google Sheet. Zapier has made it very easy to create these automations. From the home page, you can choose your apps (in our case, the Webhooks by Zapier and Google Sheets) and what you want to happen.
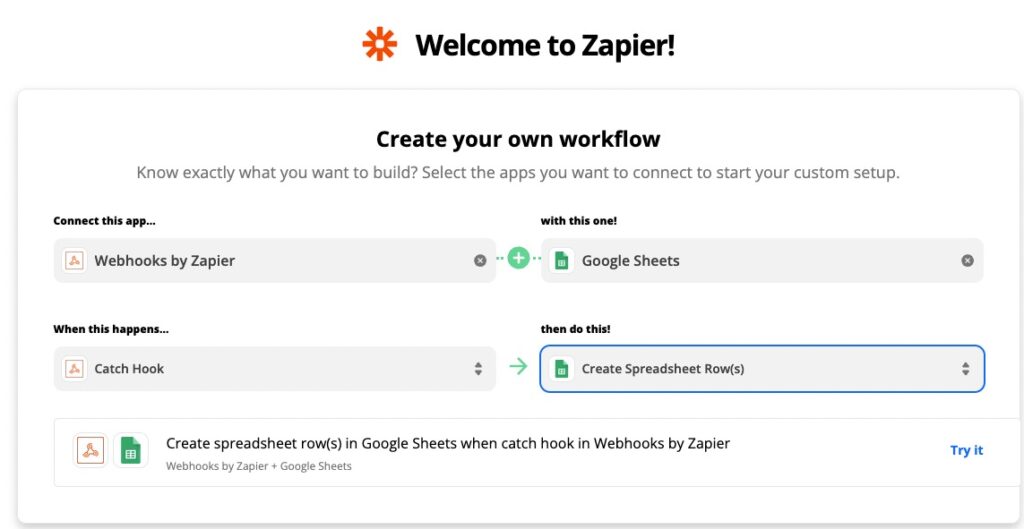
The next screen gives you the Custom Webhook you’ll need for your Home Assistant-powered data tracker.
Home Assistant Data Tracker
Now go to your Home Assistant install, and set up the RESTful command. Here you will need the Zapier Webhook URL, the method (POST), and the payload. The payload is set up as a JSON value, and in this case, we are using Home Assistant’s template language to pass the values in our Google Sheet.
activity_tracker:
  url: "https://hooks.zapier.com/hooks/catch/yourZapierCommand/replace this"
  method: POST
  payload: '{"record":{"date": "{{ date }}", "time": "{{ time }}", "type": "{{ type }}", "value": "{{ value }}" }}'
Note: You’ll most likely need to reload your configuration after adding this value.
After we do that, we need to set up how we will track the emotions. Home Assistant allows you to repurpose the Phillips Hue Switch as a four-button controller. We are going to use the buttons in the following manner:
- “On” – Happy
- “Dim Up” – Content
- “Dim Down” – Neutral
- “Off” – Sad
Create a series of automations for each one of the button pushes.
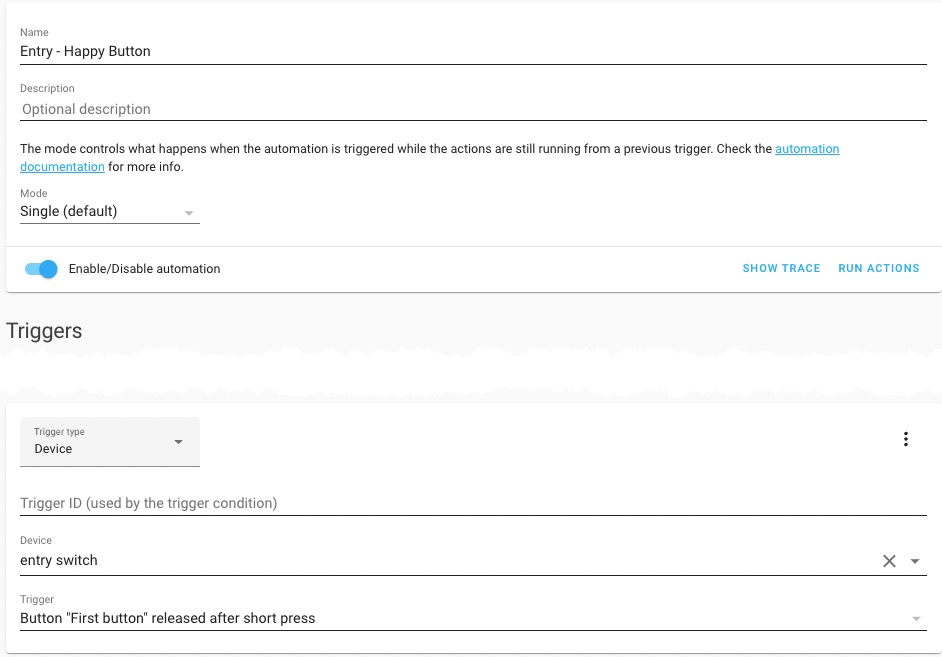
For the actions, you’ll have to the YAML configuration. Here’s the YAML for you to use. The data value equates to the payload that we set up. The order doesn’t matter. Note we are using some date manipulation, so the data is how we want it in our Google Sheet.
service: rest_command.activity_tracker
data:
  time: '{{ strptime(now(), ''%H:%m'').time() }}'
  date: '{{ strptime(now(), ''%Y-%m-%d'').date() }}'
  type: emotion
  value: happy
Tying it all Up
You can now test the automation by pushing the buttons and going back to Zapier to see the fields returned.
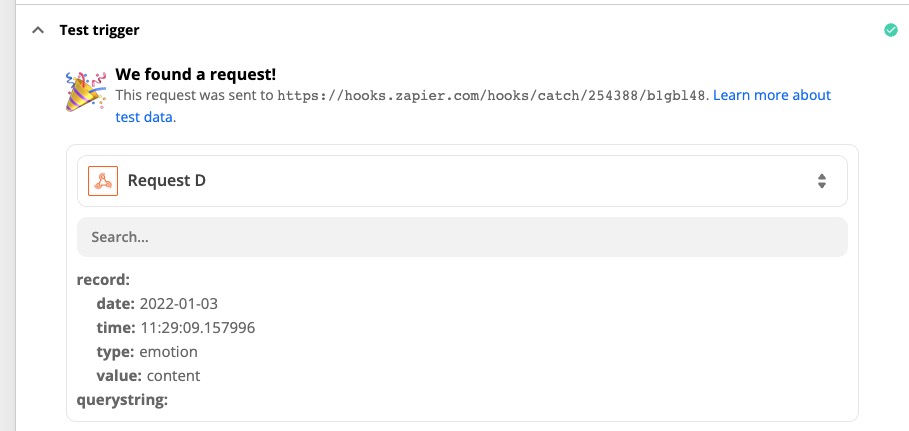
Use those fields to populate your Google Sheet and test it!

Now you have your data tracker writing to an easy to analyze spreadsheet!
Enhance your Data Tracker Recursively
Recursive automation is about making things work for you with iteration. So how can we iterate our data tracker?
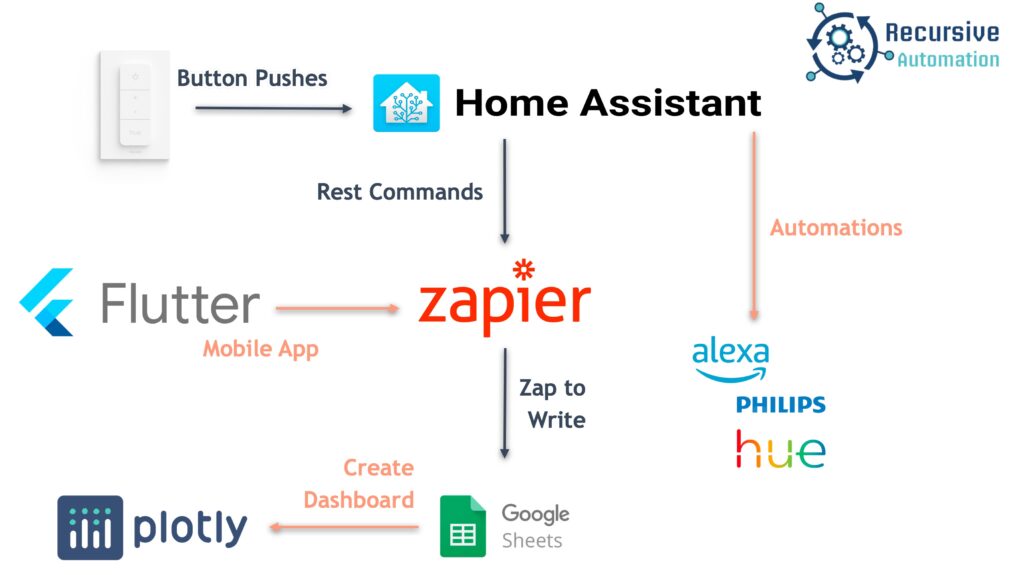
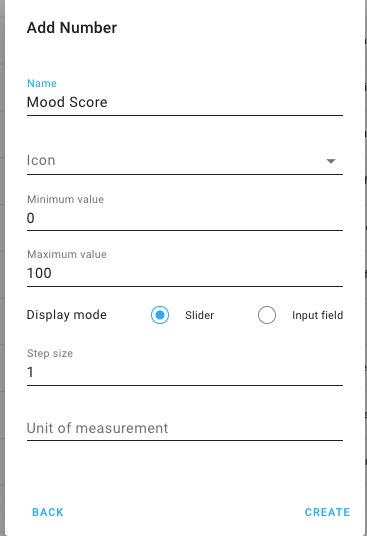
The beauty of Home Assistant is that you can have multiple actions off of the same trigger. So maybe you change your lights based on your mood or have Alexa tell you a joke! You can also create a Helper that tracks your mood over time.
Since we set up a webhook in Zapier, you can use other applications to write to Google Sheets. Whether you use Flutter or another web application to call the webhook, you can add all sorts of information.
Finally, once you have the data, you want to analyze it! You can create charts in your Google Sheets or use Python and plotly to create dashboards.
If you’re just interested in Home Automation, make sure to subscribe to the Recursive Automation e-mail list!


One thought on “Create a Data Tracker with Home Assistant and Zapier”
Comments are closed.